A few weeks back I got a few Teltronic M-4000 radios to see if I can put those to work on the UHF amateur radio range. To my surprise, there were not a lot of information about this radio online.
I have decided to share what I found during the last few weeks in order to get the radios to work. The first thing I wanted to do was to get my hands on a programming cable and the programming software. But again, no information anywhere
I contacted a few fellow hams I suspected had some information because they were discussing about this radios on forums several years ago.
One ham from spain helped me getting the programming software and one from the Netherlands helped pointed me to the information about building the programming cable for another radio (Teltronic MDT-400) but We suspected the cable pinout would be the same.
These Teltronic M-4000 radio is not like any other radios I worked with in the past. It has no incorporated speaker and it has in the back of the radio a DB26 port which allows to basically operate the radio completely, including connecting the speaker.
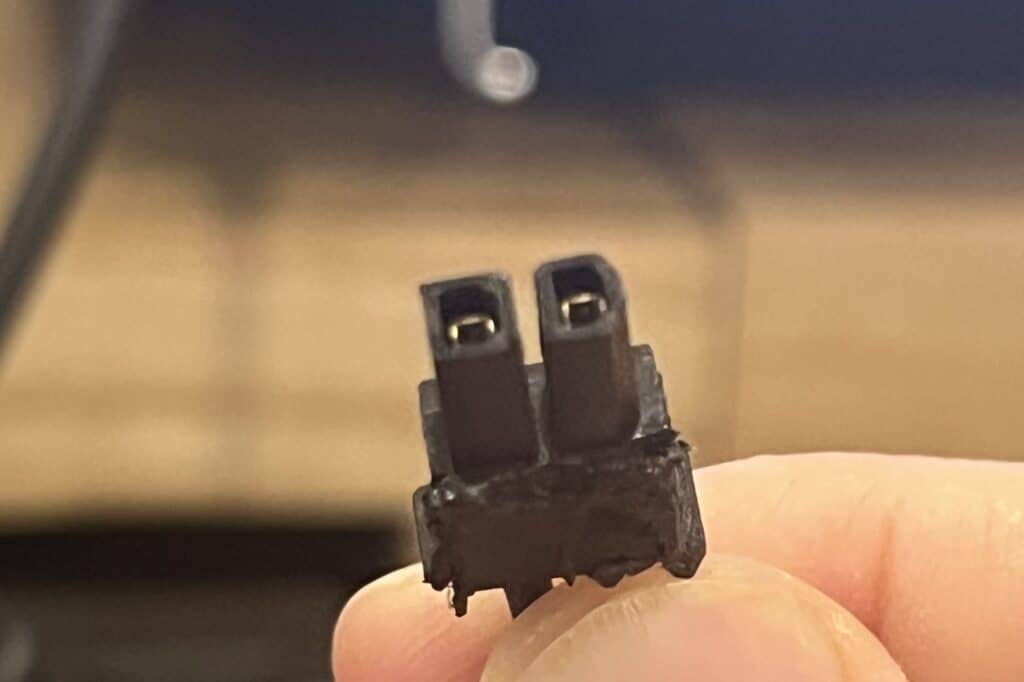
Also the power connector is not like anything I have seen in the past. It seems to be a Molex 5557-02R Mini-Fit-jr connector. In my case I used part of a connector from a GPU that used to do some crypto mining.

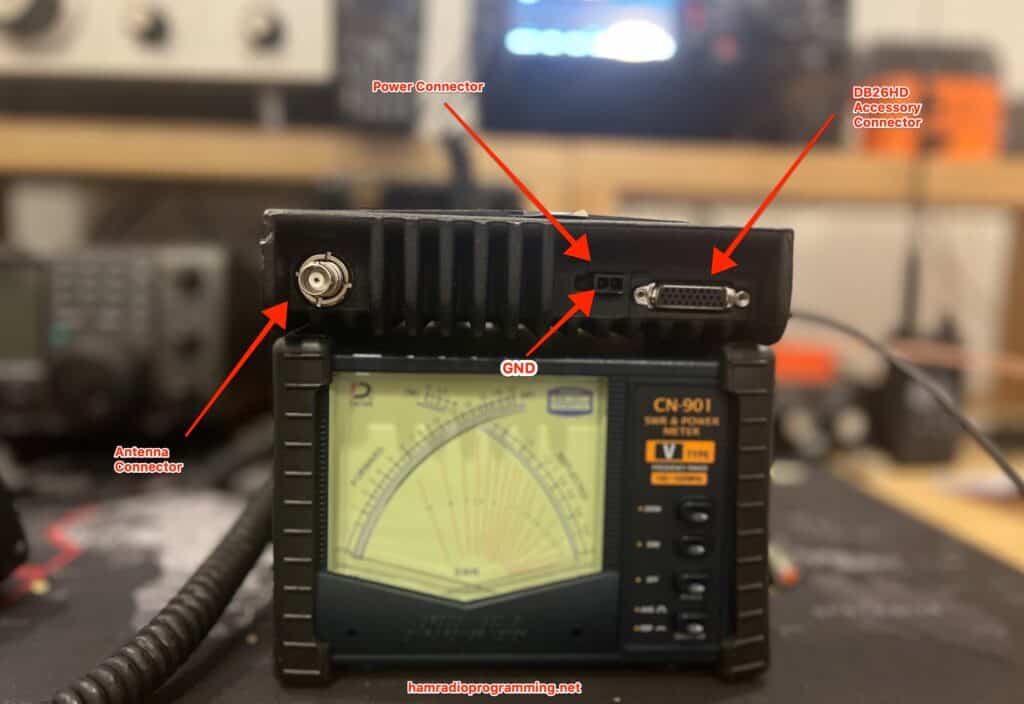
The following, is a photo of the back of the radio. Yoy can see a BNC connector for the antenna, the power connector and the DB26, DB26HD specifically, that allows you to operate the radio including, remote microphone, a speaker and radio programming.

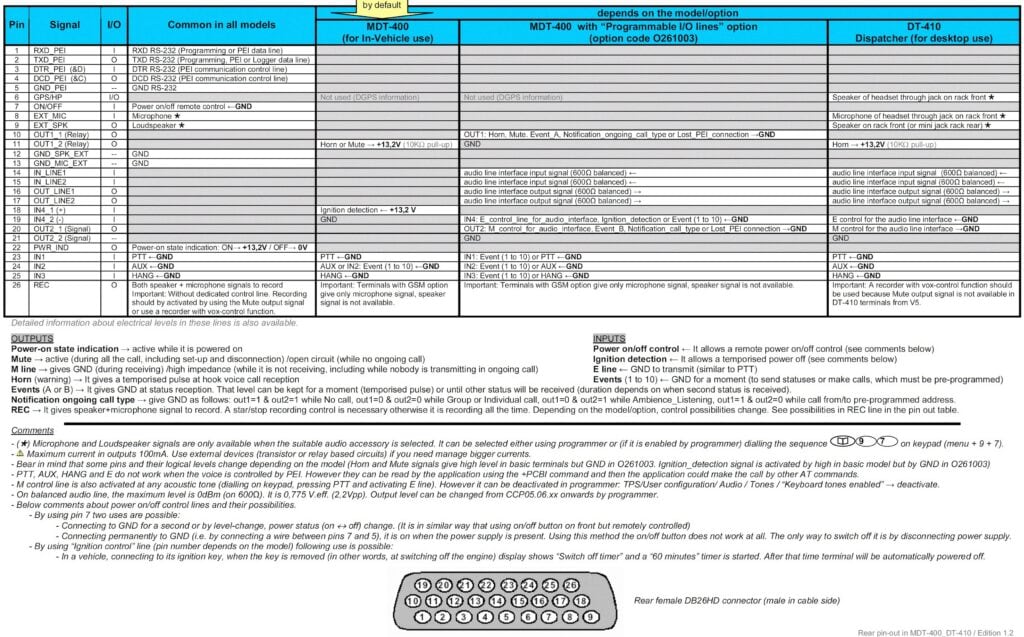
Haven’t tested the pinout yet, but according some information I found about the Teltronic MDT-400 the following image explains the pinout of the rear port.

Now I have to build the programming cable in order to try this. I gave a try to the rear port using pins from 1 to 5 but this didn’t work for me and this is why I cannot guarantee the pinout is right for the Teltronic M-4000.
On this forum thread, PA1L provided some information about the programming cable for the Teltronic MDT-400 which, again, I believe it should be the same for the Teltronic M4000.
The programming cable is a DB-9 connector on one end and a RJ45 on the other using just 3 wires. According to the information PA1L provided the pinout should be like this:
| DB9 | RJ45 |
| PIN 2 | PIN 3 |
| PIN 3 | PIN 2 |
| PIN 5 | PIN 4 |
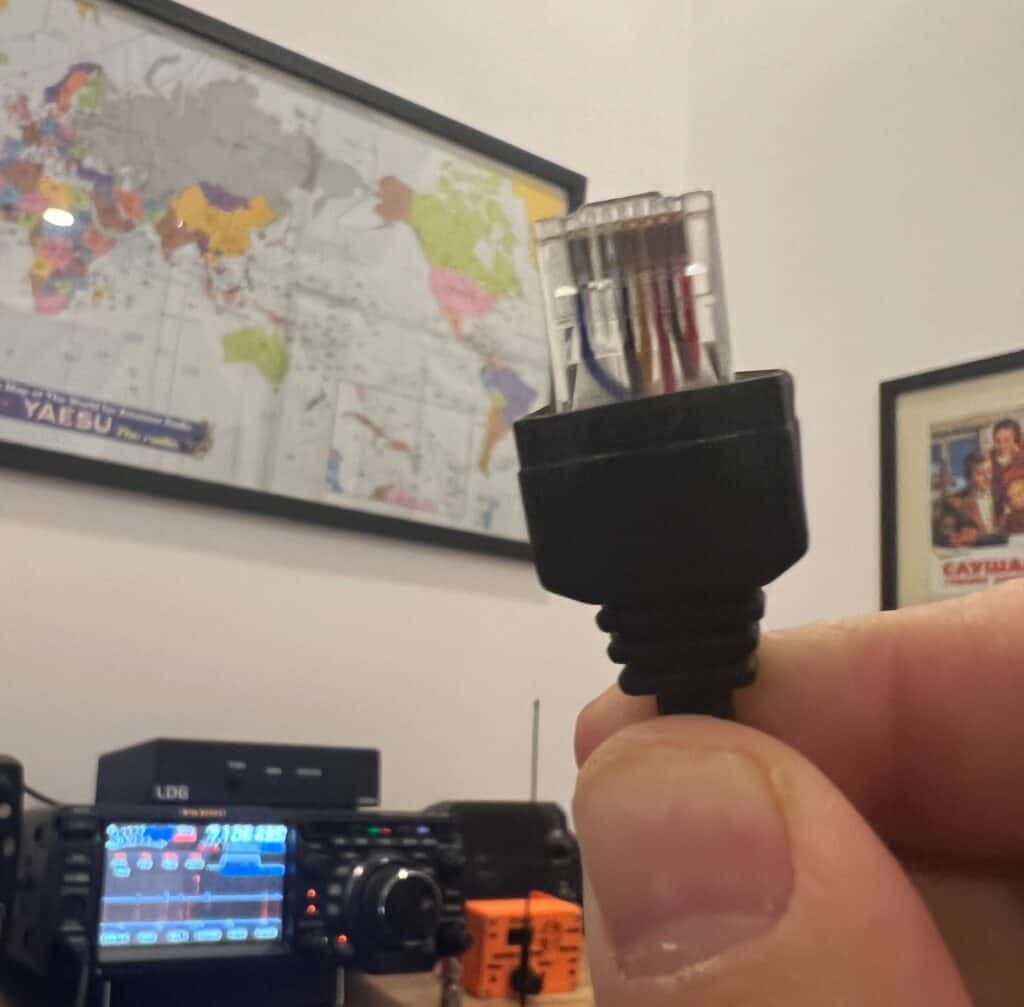
I believe this is the right pinout because I took the following photo of the microphone’s RJ45 connector and you can clearly see that pin 2, pin 3 are not in use and pin 4 (which I suspect is the ground) is in use.

During the following weekends I’m going to try:
- Build the Teltronic M4000 programming cable using a computer network patchcord
- Connect a spaker to the radio following the pinout shown previosuly
- Program one of the Teltronic M4000 I got
So far I found out that the programming software has 3 different modes being one “Engineering mode” which I believe is the one I should use to program the radios out of the original frequency range to the amateur range.
The thing is that to access the engineering mode a password, which I don’t have, is needed. If you have information about this password please share it with me so I can post it here and share it with others.
Will keep this post updated as I find new things about the Teltronic M4000 radio.
Hope this post helped you understand how to build your own programming cable. If you have any questions feel free to leave a comment here or publish a post on the Teltronic Radios user forum.
Thanks for reading.
73’s de LU9CNS, Nicolás

Hola, saludos cordiales desde Venezuela. Tengo un MDT-400 que me regalaron hace tiempo y estoy tratando de conseguir el Software de programación para poder ponerlo operativo, si me podrias ayudar e informarme donde lo puedo bajar o si tu lo tienes me lo podrias mandar al correo electrónico.
De ante mano muchas gracias por tu colaboración. 73.
¿Qué software usa el MDT400?